|
|
CAP 201a - Computer Animation I
Lesson 3 - Chapter 5, Animating a Ball
and Chapter 6, Animating a Thrown Knife
Objectives:
Chapter 5 introduces the use of the time
slider, keyframes, and the curve editor. Objectives important to this
lesson:
- Frames, key frames, and in-betweens
- Animation: bouncing ball
- Track editor-Curve editor
- Tangent types
- Squash and stretch
- Layering animation
- X-form modifier
Chapter 6 continues the lesson on using the
curve editor. Objectives important to this lesson:
- Trajectories
- Anticipation
- Momentum
Concepts:
Modeling is a vital skill in computer animation, but so is
animation itself. In our previous texts from these authors, animation
was introduced in earlier chapters with simple projects. These have
been eliminated in this text. We will continue at this point with Chapter
5 to introduce the basic animation tools and to actually animate
some objects.
It has been a while since you should have been exposed to some
basic terms, so let's review them:
As they have done before, the authors ask you to copy the project
folder for this chapter to your working area, and to set
3DS Max to use that as the root folder for this project.
For the exercises in these projects, you will want to have Auto
Key turned on before you make changes to objects in the scene.
The Auto Key feature automatically captures key frame information for
common changes to objects, but only when it is turned on.
Project: the Bouncing Ball
This project includes a series of exercises to animate a
bouncing ball in several ways. Begin as indicated on page 111, by
- copying the project file from your download or from the class resource
drive to your working area,
- and setting 3DS Max to
use that as the root folder for this project.
Project Exercise 1: Animating the Ball
The exercise starts by telling you to open a scene file. Find
it and open it in 3DS Max. The text says that you will be working on
the gross animation for the scene first. Setting the
gross animation is also called blocking the scene,
which may be more familiar to you if you have been an actor. If neither
term is familiar to you, you will be working on the major
movement of objects (and characters, if the scene had
characters). Sometimes programs refer to both objects and characters as
actors, since both can be animated in a scene.
 The scene contains a ball object. In
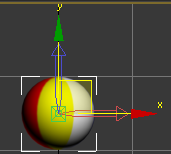
step 1, you adjust its pivot point. Select the ball, then open the Hierarchy
panel, choose Pivot, and click the Affect
Pivot Only button. Move the pivot point to the bottom of the
ball, then turn off the Affect Pivot Only
button. The scene contains a ball object. In
step 1, you adjust its pivot point. Select the ball, then open the Hierarchy
panel, choose Pivot, and click the Affect
Pivot Only button. Move the pivot point to the bottom of the
ball, then turn off the Affect Pivot Only
button.
Pivot points can be located outside the objects they affect, so be
careful not to place the pivot point outside the ball in this step. - The time slider is used to move forward
and backward in time for an animation. It should be at frame 0
by default. Don't move the time slider yet.
- Turn on the Auto Key feature (by clicking
the button that says Auto Key) and now drag the time
slider to frame 10. (The currently selected frame
number is displayed on the slider.)
- Click the Select and Move tool, and
select the ball. Move the ball to 0
on the z-axis with the mouse or with the transform
type-in box at the bottom of the interface. This should result
in a keyframe at time 0 and at time 10. I had you
turn on Auto Key before moving the time slider to capture the initial
position of the ball, not just the second position. In this version of
the program, this precaution may not be necessary. In previous
editions, it was a good idea.
- The text starts its numbering over again. I will not do so
here. You should turn off the Auto Key function now.
In frame 20, you want the ball to go back to the same
position it was in originally at frame 0.
The text sensibly recommends that you copy the keyframe in frame 0 by
selecting that keyframe (click it on the
timeline), holding down a shift key, and dragging
the keyframe to time marker 20. Note that this does not result in a
dialog box about making a copy or an instance or a reference. Copies of
keyframes are just copies.
- You should scrub the time slider to check the movement so
far. (That means you drag it left and right to see the animation.)
The text turns to the idea of turning a few frames into a repeating
cycle by using a tool called the Track View Curve
Editor. (The Track View tool has another editor, the
Dope Sheet, which is not used in this chapter.)
Project Exercise 2: Introducing the Curve
Editor
The exercise starts on page 114.
- Make sure the ball is selected. Use this
menu sequence: Graph Editor, Track View,
Curve Editor. You should see a screen
something like the one on the bottom of page 114.
- Look at the illustrations on page 115, regarding step 2.
Find the Controller menu, open it, and click the Out-of-Range
Types button. (And pause to wonder what kind of person named
it that. If someone suggested that name to me, I would have asked them
to call it the Extrapolate Curve button. That's what it does.) As the
exercise notes, the Out-of-Range part of the name refers to extending
the curve beyond the range of the first and last keyframes.
- Once you have clicked the button with the awful name, you
will see a dialog box with a worse name (Parameter Curve
Out-of-Range Types) that lets you choose one of the six ways the
program knows how to extend the existing curve.
Question 1: What are
names of the six types of curve extensions?
For this exercise, click Loop, then click OK.
- Note the dashed line in the curve editor
that stands for the extrapolated curve. (To extrapolate means
to predict what would happen if something were to continue. Anger at the program is not the only reason to increase your vocabulary.)
The features of the Parameter Curves are
discussed on pages 116 and 117. Two more related concepts are
introduced: ease-in and ease-out.
These features can be applied to any keyframe. They mean that the transition
into or out of the keyframe can be made more gradual
and less abrupt.
Page 118 brings up the concept of gravity, as it applies to a
bouncing ball. The animation does not look realistic yet, because a
real bouncing ball moves faster as it approaches the bottom
of a bounce, and moves slower as it approaches the top
of a bounce: down is working with gravity, up is fighting gravity.
Our ball is moving at the same rate at the top and the
bottom of the bounce. The text introduces a new technique to handle
this problem, using the Curve Editor again. (This time it uses the Mini
Curve Editor. Don't be confused by that. It is just smaller
version of the Curve Editor that leaves more of the viewports visible
than the larger Curve Editor.) The text refers to the thing you will
edit next as a tangency. A tangent is a line that
touches a curve at one point. In a sense, the keyframes
touch the curve of change for an object at one point
on that curve. What you are editing is the way the
keyframe is attached to the curve. The default kind of tangent for a
keyframe is Smooth, which moves into and out of the
keyframe at the same rate.
Project Exercise 3: Changing Tangency Type
In the procedure on page 119, you change the tangency of the
keyframe at the bottom of the bounce to Fast.
This makes the ball speed up near that keyframe. You leave the
tangencies at the top of the curve Smooth.
The effect of this is to make the ball "less fast"
when it is near a Smooth tangency, and "more
fast" when it is near a Fast tangency. Make
the changes indicated in the text.
The text changes topics again on page 120, explaining that the
ball should also be compressed a bit at the bottom of a bounce, and
it should extend (elongate) a bit at the top of a bounce. The two
concepts are called squash and stretch.
Project Exercise 4: Squash and Stretch
- In step 1, select the ball and turn on
the Auto Key feature. You are told to
turn on the Mini Curve Editor and drag the Track
Bar Time slider to frame 10. Before you do this,
take note of something. Turn the Mini Curve Editor off,
and move the Time Slider on the scene timeline to Frame
10. Now turn on the Mini Curve Editor and
check the position of the Track Bar Time
slider. It looks like it is on Frame 9, not
10. The scene timeline and the Mini Curve Editor do not appear to use
the same numbering scheme. Take this into account as you use the Track
Bar Time slider.
After you move the slider, you are told to access the flyout
for the Scale tool and choose the Select and
Squash mode for the tool. (A tiny picture appears on page
120.) The instruction after that picture is poorly worded. What you
should do is place your mouse pointer over the blue handle (z-axis
handle) of the transform gizmo that appears on the ball. Watch the
values change in the type-in transform boxes at the bottom of the
interface as you drag that handle down. You want the value for the
z-axis to be about 80. (It is practically impossible to be exactly
80 unless you enter that number manually.)
Note that the other values go up as the z-axis value decreases. The Select
and Squash tool maintains a constant volume
for the object, so as z is decreased, x and y increase. Get a balloon,
blow it up about half way, then play squash and stretch with it. You
should get the idea quickly.
- Step 2 tells you to move to Frame 0. Drag
the z-axis handle again, this time to increase the z value to
about 120.
- The text tells you that you could shift-drag
keys to copy them from one position to another on the
timeline. Since the Mini Curve Editor is blocking your view of the
timeline, it is good that you can copy the keys in the Mini
Curve Editor (or the Curve Editor) as well.
- First, select the Scale track in the Controller
window.
- Second, find the Move Keys tool in
the Mini Curve Editor's toolbar.
- Access the flyout for the Move Keys
tool as indicated in the text, and change it to the Move Keys
Horizontal tool. You will use this tool in a minute.
- Drag a selection marquee around the
indicated keyframes located at frame 0. (You do not need a special tool
for this. Just drag a rectangle around them with your mouse.) You can
now shift-drag any one of those keyframes to copy it
to frame 20, and the others will be copied there as
well.
- Use the Mini Curve Editor's menu bar to
select Controller, Out-of-Range Types.
Click Loop, and click OK. Test
and save incrementally.
The next problem is with the timing of the
squash and stretch events. 3DS Max has automatically calculated in-betweens
that assume a constant transition from one state to
another. This is not realistic: the ball should not
squash before it meets the floor, and it should recover immediately
upon bouncing. (You should realize that the squash and stretch effects
used in this scene are exaggerated, but we still want some
realism.)
Project Exercise 5: Setting squash and
stretch timing
(From page 122: "...follow these steps as if they were law." I beg
your pardon? I know comedy is difficult, but come on.)
- Close the Mini Curve Editor. On the
scene's timeline, put the time slider at frame
8. Make sure Auto Key is on. Use the Curve
Editor (not the Mini Curve Editor) for the next steps. Locate
and select the ball's Scale track. (The ball has to
be selected first.) Find and click the Insert
Keys button on the Curve Editor's toolbar. Click a Scale
curve at the marked frame. A new keyframe appears on all the Scale
curves. The book notes that only two curves appear because x and y are
the same values.
- Examine the picture on page 122. Find the
two type-in boxes indicated in that picture. The left
box is for the frame number, and the right
one is for the value to use at that frame. You should
be on frame 8 at this time. Enter 100
in the right box to set all the selected Scale curves to 100% at frame
8.
- In step 3, you are instructed to move the time
slider to frame 12, add new keyframes, and
to set the curve values to 100 at
that keyframe as well. The effect should be to make the ball squash
only for a few frames in each cycle.
- Turn off Auto Key and test.
Change if necessary, and save when it is right.
On page 123, the text discusses adding a forward
motion to the ball. It refers to adding this
motion at this stage as layering animation. This does
not mean that you are using layers as you might
in a Photoshop image. It just means that if often makes sense to get
one kind of animation right (like a vertical bounce)
before you add another kind (like a horizontal movement).
This method requires that you think about animation
like an animator (or a physicist) instead of like an audience member.
You need to plan the different kinds of motion that
will be needed for the scene, and assign values to each part of it
across time. Of course, this would be easier to do if someone
had provided a story board of the planned animated scene to us.
You have already made the ball bounce up and
down. Adding a forward motion
in the same time sequence will make both
motions happen at the same time. You could make the two
motions sequential by having them happen at different
times. That is not what we want. We want the ball to bounce
as it moves along a path. It is useful that you can
add the up and down motion, then add the left
to right motion, and you will get the resulting arcing
bounce motion without having to calculate the arcs. (You will,
however, need to fine tune it. Animation is not totally automatic, else
you wouldn't be needed as an animator.)
Project Exercise 6: Moving the ball
forward
- This one starts on page 123. In the scene, move the time
slider to frame 0. Click the Select
and Move tool, then click the ball. Right-click
the Perspective (Camera) viewport to select it. Move
the ball to the left as noted in the text, which will be a change of
about -30 on the x-axis.
- Move the time slider to frame 100. Turn
on Auto Key. Move the ball to the right, to about +30
on the x-axis.
- Open the Curve Editor. Find and select
the x-Position track.
- The text informs us that keyframes were automatically
created on the x and y Position
tracks when you created the up and down motion. Those
keyframes were placeholders. Find the keyframes on
the x-Position track at frame 10 and frame 20.
Select them (click them) and delete
them (press your Delete key).
- Click our now-familiar friend, the Out-of-Range
Types button. (The text calls it the Parameter Curves
Out-of-Range Types button. It used to be called that, now its
name is two words shorter. Aren't you thrilled?)
Choose Constant and click OK. Turn off
Auto Key. Note the shortcut key for playing the
current animation: /. (This is the slash
key, not the backslash key. If you call it by the wrong name, it will
become angry.)
- Note the shape of the curve in the Curve Editor at this
point. Its ends (at frames 0 and 100) indicate an ease out
and ease in at those points. This is the default
tangency at work. You want to change this. Select
both keys in the Curve Editor (with a marquee?) and click the Linear
Tangent button. Or would an ease out make sense for
the first one? Objects do not typically accelerate from 0 to x
instantly, do they? The answer depends on the scene. Did someone toss
the ball? Ease out of the frame. Did a ball suddenly appear from a rift
in space/time? Is it already at full speed, having travelled some
distance before we saw it? Use a linear tangent.
This is a good place to pause and save
again. Remember to save your file with a new, incremental
name, so you have more than one place to go when you need to go back in
time.
On page 124, the text addresses a problem it
created back at the beginning of the chapter. The ball should also roll
as it bounces. This is another natural movement for a thrown ball. The
problem in this case is that it can't roll on its
pivot point, because we moved the pivot point to the
bottom of the ball for squash and stretch. We can't move the pivot
point back to the center, because we needed it where we put it. We
can't add another pivot point, because it can only have one. (Really? Any more helpful roadblocks?) So what do we do? We can
use a modifier that will act like a pivot
point: the XForm modifier.
Project Exercise 7: Adding a roll with
the XForm modifier
- Make sure that Auto Key is turned off.
Select the ball. Add an XForm modifier
to the ball with the menu sequence in the text, or with the Modifier
List, which is more memorable. (You should know both methods exist, and
use whichever you like.) Note that the XForm object has two
sub-objects: Gizmo and Center.
- Expand the XForm item in
the modifier stack, and select its Center sub-object.
- Click the Align tool, then click the ball.
You will see a dialog box. Make sure that all three axes
(x, y, and z) are checked. Click the the choice that
says Center under Target Object, and click OK.
The text pauses to make it clear that an object can have
only one pivot point. You have not added another
pivot point, you have just added a center point to
the object that it can rotate around. (I wonder if there is some judge
watching us to make sure we don't violate a copyrighted feature or some
such.)
So, now that you have the XForm modifier configured, you
need to use it. Continue on page 126.
- Turn on Auto Key. Click the Select
and Rotate tool.
- Click the XForm's Gizmo sub-object. The
text reveals that this is necessary to rotate around the XForm center
instead of the ball's pivot point (default).
Before you move ahead, think! Which way should the ball rotate? Which
viewport should you use to rotate it? I have seen too many balls spin
backwards. Don't do that.
- Put the time slider at frame 100 (the last frame). Rotate
the ball 360 degrees on its y-axis. (You may want to use the transform
type-in box for this.) Click the XForm object to leave sub-object mode,
and test the animation.
Question 2: Explain, in
your own words, why the XForm modifier was needed for this exercise.
This section of the text ends with an overview
of how to edit any of the keyframes used above.
Project: anticipation and momentum in a thrown
knife
Chapter 6 contains a series of exercises to
animate a knife thrown at at target. Begin as indicated on page
129, by copying the project file to your hard drive, and
setting the project root folder.
Project Exercise 1: Blocking the scene
- Open the start file. Move the time slider to frame
30, and turn on Auto Key.
- Move the knife into the target
as illustrated at the top of page 130. I had to move it down a bit as
well as horizontally to make it look right.
This is the first time you will have seen that objects in 3DS Max can
easily penetrate each other. Up to now, you have been
guided around that fact.
- Move the time slider to frame 15 and move
the knife higher in the scene, as
though it was at the peak of an arc.
The text offers no measurement for this, so make a guess
about a good z-axis value. The text does not show
you a good trick until later. You should know about it here. Do this:
- Open the Display
panel on the Command panel set.
- Scroll down to the Display Properties
rollout.
- Turn on the checkbox for Trajectory.
- You should see a red line on the screen.
Question 3: The red
line is the knife's trajectory. What information does this line give
you visually?
- The step shows you how to increase or decrease the number
of frames in a scene. (This is a very important skill
to have, so learn the location and use of this
button.) Click the Time Configuration button. (You
will find it near the Viewport Navigation Controls, the fifth
button from the bottom right corner of the workspace, unless they have changed it again.)
Once the Time Configuration window is open, find the End Time
field. The default value is 100 (frames). Change its value to 30.
Note that the End Time value will match
the Length value (30), and the Frame Count
value will be one more (31). Click OK to save this setting. This is a
useful technique for lengthening or shortening the number of frames in
a scene. Remember it, because you will use it again.
- The text asks you to play the animation, and to watch for
the default ease out and ease in at
the ends of the knife's path. This step also tries to provide a plan
for the next several steps, but there is a typo
in the way. Let's assume that we were just told that the knife should start moving at frame 10, not
frame 0. To make this correction, open the Curve Editor.
Find the x, y and z Position tracks in the Controller
window, and use Ctrl-click to select all three of
them. (Actually, they were all selected when I opened the curve editor.)
- Drag a marquee selection around the keyframes
at frame 0. Change the Select and Move tool
on the Curve Editor toolbar to the Horizontal Move
tool and use it to move the selected keyframes to frame 10.
Why use the Horizontal Move tool? Because you only want to move those
keyframes in time. The Horizontal Move tool is supposed
to constrain movement to the time axis, leaving the values on the
position axes unchanged. Well, that was a good idea in earlier versions
of the program. When I tried it this time, I found that the mouse would
move the keys vertically anyway. When you do it, note the vertical
value of one of the keys. Drag all the keys at once, but try to set
them down in the same relative vertical position at Frame 10.
- The action in step 6 changed the length
of the action. The new middle frame is 20, not 15.
Use the method in step 6 to move the keyframes
currently at frame 15 to frame 20.
The text introduces another "new" concept on page 132: trajectories.
We have already touche on it. In 3DS Max, a trajectory is the path an object takes
through a scene, made visible. The trajectory of the
knife in this scene is illustrated in the images at the bottom of page
132. To see a trajectory, select the Motion panel,
and click Trajectories. I told you to do it earlier
because it makes setting the path much easier.
On page 133, you are told to click the Sub-Object
button on the motion panel to get to the Key subobjects for the
trajectory. There is a step missing. You have to
click the Trajectories button first, then click the Sub-Object button.
(By default, my computer had the Parameters button
clicked, which was a problem until I realized what to do). Use the
procedure on these two pages, moving the key frames as subobjects, to
experiment with adjusting the vertical rise in the knife's path.
Knives that are thrown for any distance tend to spin.
The text continues the lesson by adding a rotation to
the knife. Again, plan this! Which viewport and which axis to rotate on?
Project Exercise 2: Adding rotation
- Move the time slider to frame 30, and
select the Select and Rotate tool. Make sure the Auto
Key feature is on. Select the knife
and rotate it on its y-axis by 443
degrees. (If you have Angle Snap turned on, 445 degrees will
also be fine.) The change in degrees is positive,
which means the knife rotates counter clockwise in the camera's current
view.
- Open the Curve Editor. Find and select the x, y,
and z Rotation tracks. This brings up an interesting point.
The Curve Editor shows rotation on the x-axis, not
the y-axis.When the knife rotates correctly, it rotates on
the y-axis and through the x-axis.
Refer to the exercise above for the method you should use to move the
keyframes at frame 0 to frame 10. Turn off
Auto Key when you have done so.
- Play the animation as instructed. You
still have an ease in and ease out,
which are not appropriate here. Why is this a step?
You need to learn to look for things to fix or
improve. You should always do this as a troubleshooting
step.
- Okay, they have been complaining about the ease in and ease
out that you get by default. It is time to correct that for this model.
Several sub-steps here.
In the Curve Editor, select the x-Position track.
Select all the keyframes on that track. Switch the
tangency for all those keyframes to Linear.
Select the z-Position track. Use the handles
on the individual keys (they appear when each key is selected)
to adjust the curve to be more like the reference illustration
in the middle of page 134.
- The authors provide more tweaks to the animation in this
step and the next. Try them, but be aware that you may not see the
improvement that the authors expect in this short animation. There is an error here, but I will address it at the
end of the project.
A person who throws a knife tends to move their hand backward
before moving it forward. This movement is referred to as anticipation.
Even though there is no hand in the scene at this time, we will add an
anticipation to the knife's movement.
Project Exercise 3: Adding anticipation
- Move the time slider to frame 0. Open the
Curve Editor and select the x-Rotation track for the knife. Click the Add
Keys button. Add a keyframe at frame 0. (Note,
in the image on page 135, the time slider is in the wrong place.)
- Select the Move tool as instructed, and
click the keyframe at frame 10. In
the Editor's Key Stats area, change the value of that
key to 240. This will begin the process of animating
the knife before the throw.
- The tangent at frame 0 is correct. Change the tangent
at frame 10 to Linear. Play
this animation and try to see why the authors don't
like it.
- Use the keyboard command to undo your
last change: Ctrl-Z. (The authors say you may have to
hit it more than once. I had to hit it twice.) Change the Move
tool to the Vertical Move tool. Select the In
tangent for keyframe 10. The In
tangent is the handle on the left
side of a keyframe. (The Out tangent would be the
handle on the right side of a keyframe.) You may have
to scroll the Curve Editor window to find it.
- Hold a shift key down as you drag
the keyframe's In tangent down to make the curve
resemble the one shown at the top of page 136. If you look carefully at
the image on that page, you will see that the authors pulled the handle
down and to the left a bit.
- Play the animation. If yours looks as bad
as mine did, you may realize that you need to adjust the other
Bezier control for the key at frame 10 as well. The authors did this,
but they did not mention it. Do so, so the knife continues to move with
some realism.
- Save again, to avoid problems.
Project Exercise 4: Follow-Through
- This next part of the project leads up to a transfer of momentum
from the knife to the target that moves the target (rocks it) just a
bit. In this exercise, you will add some frames and work on the knife.
In step 1, open the Time Configuration window again,
and change the End Time value to 45.
As the text explains, this will add fifteen frames to the end of the
current animation.
- Select the knife. Move the time
slider to frame 30. Open the Curve
Editor. Select the x-Position track for the
knife. Add a keyframe using the methods above at frame
35.
- The authors ask you to check the value of
the new keyframe by looking at the type-in boxes in
the Curve Editor. In their case, the value was about -231,
and they advise changing it to -224 (a difference of
7), to sink the knife farther into the target. My initial value was
very different, and yours may be as well. Adjust your
value up and down a bit to get a
depth into the target that you like, making sure that the knife is not
bouncing out of the target.
- Check the animation to make sure the knife
is moving as desired. You may want to try adding just a little
bounce here. A very small one. How? Pull the Bezier handle
for the last key so there is just a little bump in the curve between
the keys at 30 and 35. (A bump goes up, a dip goes
down. Yes, more vocabulary.)
- The authors want to add a bit of follow-through
(after the main action) rotation to the knife. Select
the x-Rotation track in the Curve Editor. Add a key
on this curve at frame 35. Note the change the
authors used between their keys at frames 30 and 35,
and adjust the value of your key at frame 35 by a similar amount. The
effect may not be noticeable.
- Save again.
Project Exercise 5: Momentum
This last part of the project in the text addresses another
transfer of momentum to the target. The target has to move
a bit, being pushed back by the knife's mass. If you have a feeling for
the physics of the situation, you can imagine what has to happen.
However, what happens if we animate just the target? Not good: the
knife has to move as well if it is in the target. We have to
animate the target and the knife together, which takes us to a hierarchy.
- Move the time slider to frame 30. Click
the Select and Link tool. Select the knife,
and link it to the target by dragging a line from the
knife to the target. (We do not want them linked in a hierarchy before
this frame.) This will make the knife a child object
of the target, which means the knife will move along with the target.
- Move the time slider to frame 34. Turn on
Auto Key. Choose the Select and
Rotate tool. Rotate the target about 5
degrees back, and be glad that the authors already moved the
target's pivot point.
- Open the Curve Editor. Select the y-Rotation
track for the target. Select the keyframe
at frame 0, and move it to frame
30. Next, shift-drag (copy) that keyframe
from frame 30 to frame 37. In both of these
operations, be careful not to change the value
(vertical position) of the original or copy frame.
- Change the tangent at frame 30
to Fast.
- Select the y-Rotation track for the target
again. Use Add Key to add keyframes
at frame 40 and frame 44. (This
seems like nonsense, since there are only 41 frames in the animation.)
Use the Vertical Move tool or the Value
entry field to set the value of the key at frame
40 to about 1.7.
- Choose the Select and Move tool. Move the
time slider to frame 37.
Move the target "just a bit" on the x-axis.
This is to show that the knife not only rocked the
target, it pushed it back a little. Open the Curve
Editor again, and select the x-Position curve
of the target. Next, select the keyframe
at frame 0, and move it to frame 30.
Change the tangent for frame 30 to Fast.
- Save the file incrementally.
Project Exercise 6: Another Tweak
Presently, the knife continues rotating even
after it has penetrated the target. If the target were plastic foam,
maybe it would. If the target is made of anything else, this is not
realistic. This is not in the book. It is my
requirement for completing the exercise.
- Select the knife.
- Turn on Auto Key.
- Open the Curve Editor. The knife should
stop rotating at frame 29, not frame 30. Change the
last Rotation key in each axis so that it happens at frame 29,
with the same value that it currently
has in frame 29. Do not just move the key
horizontally, since this will keep the value that it currently has in
frame 30. Move it vertically as well, to stop rotation upon full
contact with the target.
- Save again, and play it
for me in the application.
|
 frames,
key frames, and in-betweens - Computer animation is based on movie
animation. Movies are composed of a series of still photos, frames,
that are shown to the viewer rapidly.
frames,
key frames, and in-betweens - Computer animation is based on movie
animation. Movies are composed of a series of still photos, frames,
that are shown to the viewer rapidly.